


Patterns in Minutes - 3D Dress Making
3D Design and Digital Patterning are changing the fashion industry
Fashion brands need an effective way to deliver more garments, in an ever-increasing number of consumer-specific variations, with shorter lead times and with less waste. 3D digital design, patterning, and automated printing/cutting technologies address these challenges by allowing companies to:
Quickly create a design from scratch or by editing existing templates and avatars
Interact with clients to personalize fit as well as the graphics on the garments
Convert the custom designs into production-ready materials in a matter of minutes
Leverage automated tools to print, cut and sew the finished product
The Process is Simple and Straight Forward.
In the past the process to go from a design to production included several iterative, time consuming steps. New digital solutions avoid these issues by allowing clothing manufacturers to integrate every task in a single environment.
3D design models provide the foundation for an effective design to production process. These models capture and communicate vital information needed to produce the garments. For a quick example of the process in action, consider the dress design shown in this article.
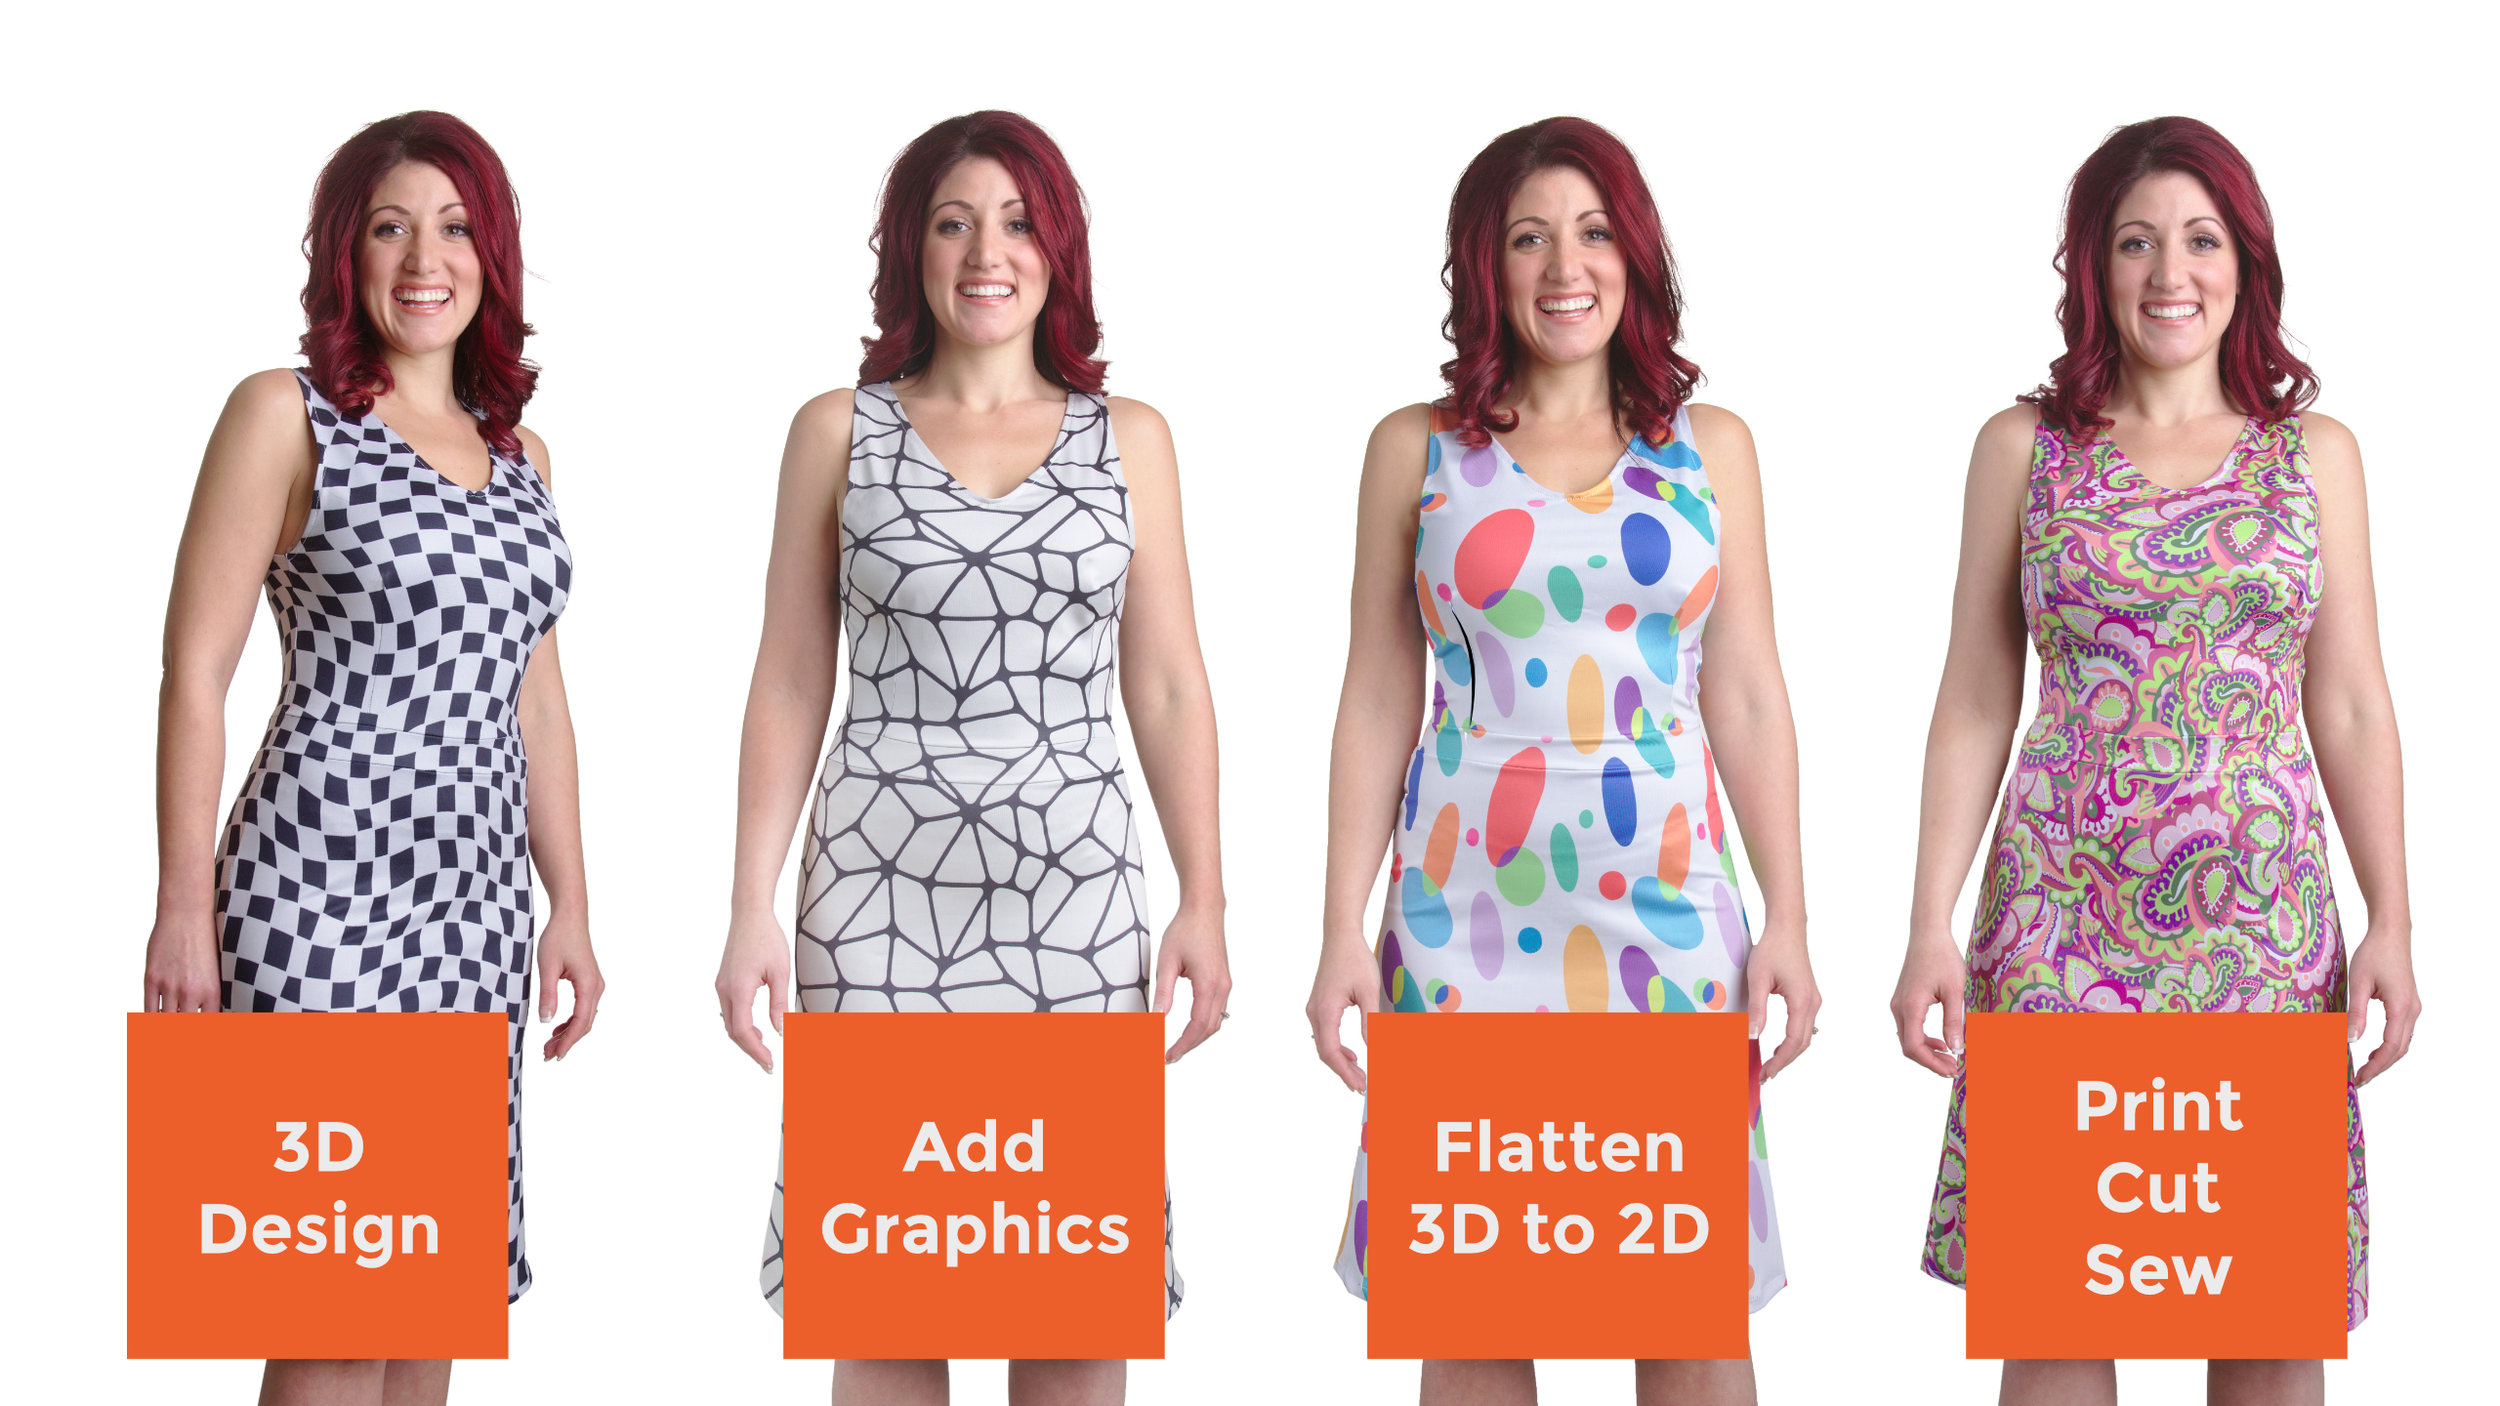
Go from concept to finish garments with customer-selected size and graphics in just a few days. Click on the image to see the process.
Step 1: Creating Design Concepts.
The product design process starts in a variety of ways. Typically, it starts with a pencil sketch that evolves into a more complete outline of the finished garment. The sketch is then translated into a 3D CAD model so that all aspects of the concept can be reviewed and evaluated.
Step 2: Customizing the Garment.
Seeing the product early in the process is critical to ensure customer acceptance and, in many cases, to help identify possible production challenges. The use of 3D CAD models provides a fast and simple way to present the design in a rendered view. With the use of parametric models, clients can request changes and see the design update in real time. This is also the stage where customer-defined graphics can be added to the virtual garment.
The Additive Design approach utilizes the model database as the core for every step process. Everything from sketch, materials specs, to pattern pieces to graphics and marker definition are integrated and “added” as the project progresses. Click to see how.
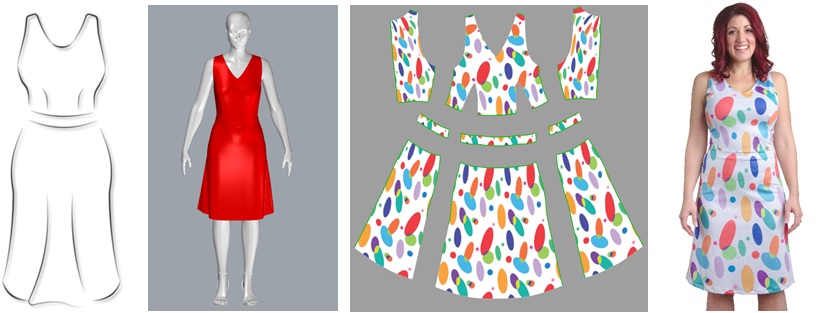
Step 3: Preparing for production (digital patterning)
At this point in the process, the digital models developed in the 3D CAD software are used to produce the production materials (patterns and drawings). In the legacy manual method, this step required the pattern makers to start over and to re-create and then iterate on the patterns. In the digital patterning environment, the 2D patterns are generated directly from the 3D model. Since all of the information about the garments is stored in the additive design database attached to the 3D model, it’s a simple process to:
Add cut lines on the 3D model to define 3D pattern pieces
Assign material properties to the pieces to ensure precise fabric behavior
Flatten the 3D pieces into 2D patterns with perfectly aligned graphics
Attach pattern features, such as seams, notches, buttons, zippers, etc.
Generate assembly drawings, and DXF cut files for use with automated cutters.

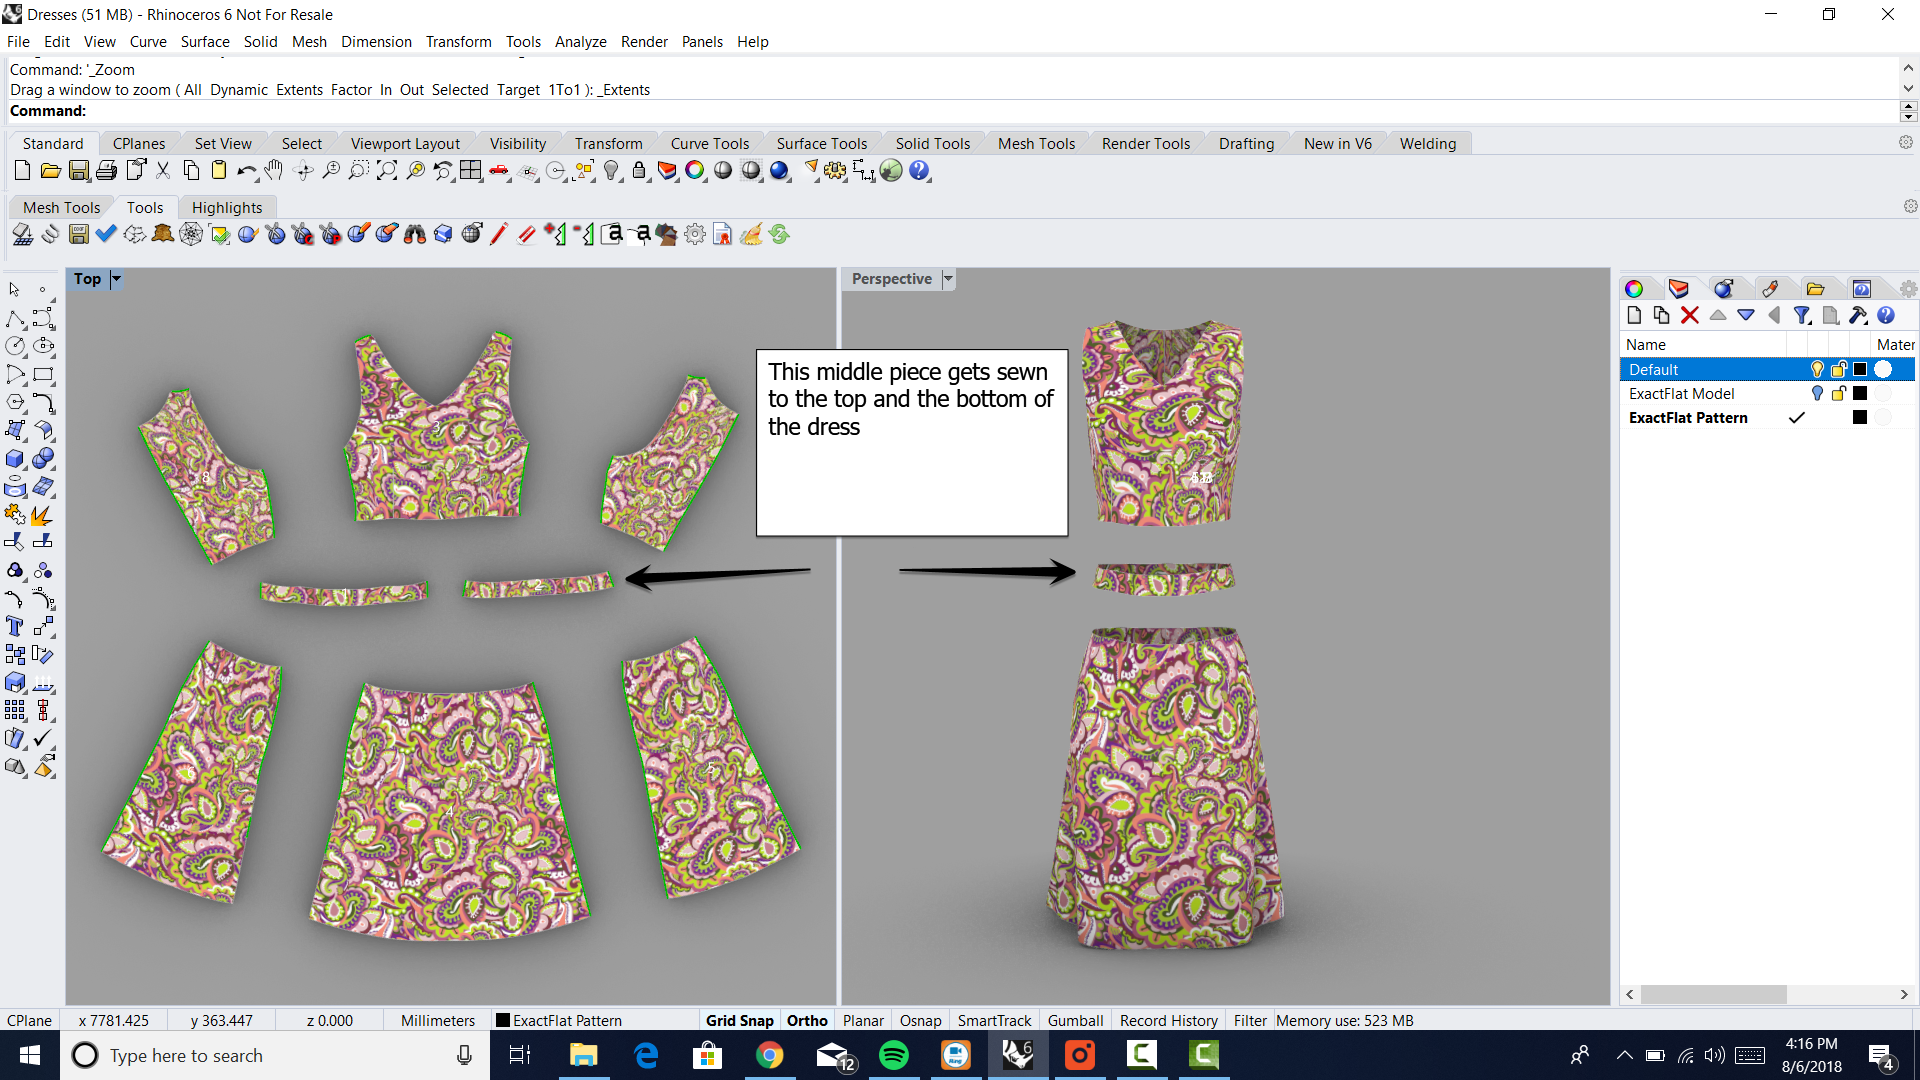
In these examples the client selected several different graphics treatments for the dress. With ExactFlat once the basic texture is applied its a simple process to swap one graphics style for any other and still ensure perfect alignment of the pattern along the seams.
Step 4: Producing the garment (Print, Cut and Sew)
Finally, the production-ready materials are sent to the textile printer where the customer defined graphics are applied to the fabric. It’s important to note that the digital patterning process ensures that the graphics align perfectly on every pattern piece. Vision technology enhances the ability of the automated cutter to locate and precisely cut each piece. The entire process from concept, to client review, to production, and on to delivery can be completed in just a few days.
Key Benefits and Next Steps
Pattern engineering processes are best when closely integrated into the product design ecosystem. It bears repeating the reasons why digital patterning is going mainstream as part of the overall digital design to manufacturing process for fashion:
It has fewer steps that can be executed faster, saving time.
The steps are linked together, so effort spent on one step is leveraged everywhere.
All of this means that you can reliably increase profit on every single garment made.
If your company is looking for a way to increase design flexibility and reduce cost, it is time to join your peers in making the transition to 3D digital design and patterning. Click on the link below to schedule a time to speak with one of our experts and determine how to get started.


