


Patterns in Minutes - Automotive Interiors Part I
The Automotive industry as always been at the forefront when it comes to design and manufacturing process automation. The use of technology is essential in the quest to continuously deliver quality products with the best possible profitability model.
3D design and digital patterning are common place in this segment. In this first article in the series we'll look at a quick 3D to 2D flattening example for a leather car seat.
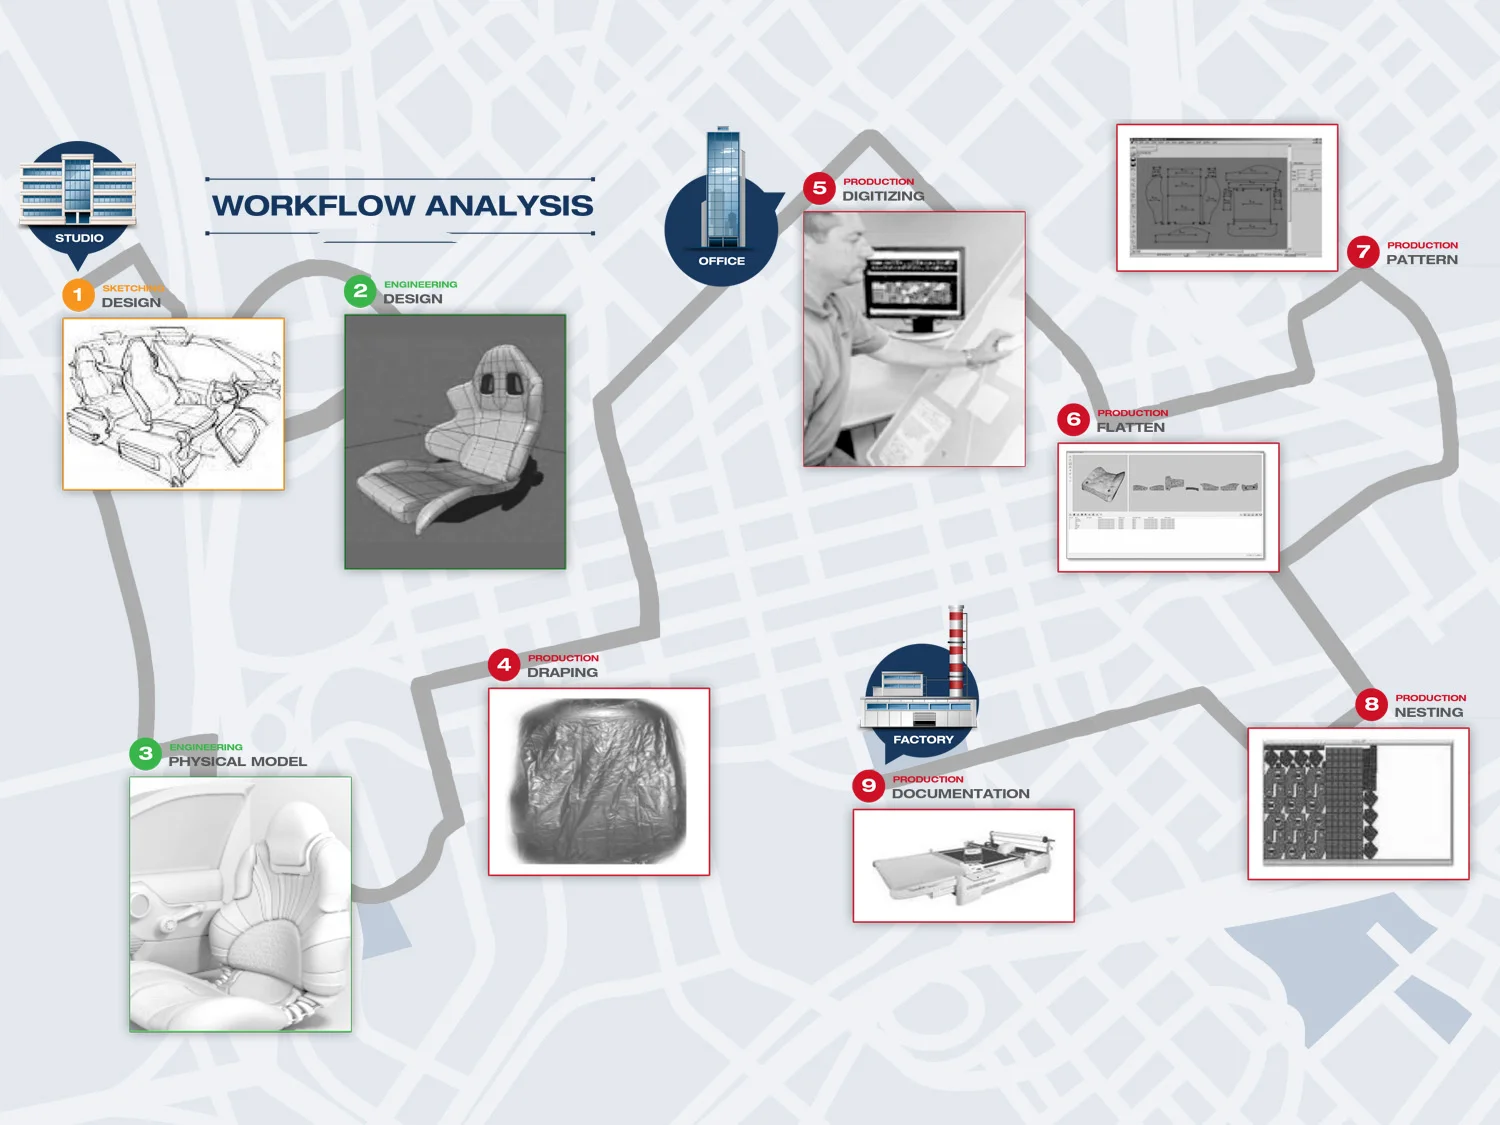
While the overall workflow might seem chaotic, it consists of a well-defined series of steps. New tools such as 3D scanning, digital patterning and automated leather printer/cutters provide additional options for process improvement.
Step 1 - Create or Capture the 3D Design
Automotive interior components need to address high standards for both aesthetics and performance. Poorly designed or ill-fitting pieces can have a dramatic impact on sales and/or production costs. 3D CAD has been used for decades to help designers get the product right.
In some cases, 3D Scanning is used to capture existing designs. This addition to the process both saves time and helps ensure that the 3D model matches the physical product.


The geometry of the 3D model seldom aligns with the requirements for production. The process of combining or cutting geometric faces into 3D pieces along desired split lines is referred to as "Piece Creation." The editing tools in the 3D CAD software make this process simple.
Step 2 - 3D Model to 2D Pattern Flattening
The process of converting the 3D design into the 2D production materials usually starts with the 3D Tech Pack or STO (Standard Trim Order). An STO may or may not be provided with cut lines drawn to indicate where seams are intended. In the past this meant that the upholstery team or manufacturing contractor would be free to add them arbitrarily. In many cases this tended to result in unneeded iterations between design and fabrication.
The current generation of 3D to 2D Flattening tools allow the designer to explicitly position the cut lines and to even include 2D flat patterns as part of the STO. These tools also provide strain and sag analysis as part of the process. Further reducing the chance of miscommunication between the teams.
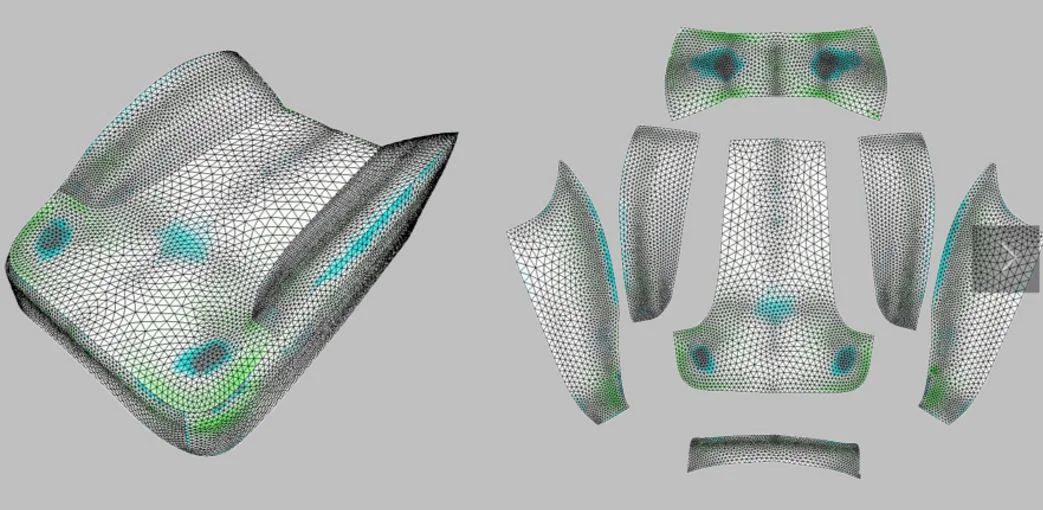
Converting the 3D model into 2D pattern pieces occurs quickly, right on the designer's desktop. The strain and Sag analysis also helps ensure a perfect pattern on the first pass.
Meet with the Experts
In our next article we'll go into a little more detail on the production prep stage of the process. In the meantime, if you have questions about how transitioning to digital patterning can enhance your process, contact our experts. Just click on the images below to schedule a time to talk.
We'll also be attending the Automotive Interiors shows in Messe Stuttgart, Germany (5,6,7 June, 2018) and Novi, Michigan, USA (23, 24, 25 Oct 2018). Let us know if you're attending and we can set up a time to meet.


