


How the Digital Revolution Impacts Furniture Manufacturing
Digital patterning integrates and accelerates the production workflow for Furniture Manufacturers
The amazing digital revolution continues to help furniture manufacturers make better products with higher profitability. The process of design-to-production has changed considerably in the past few years, moving from mass production to mass customization. This shift is dictating a new, virtually interactive relationship between the furniture designer, buyer and manufacturer.
Digital Patterning, the newest component in the solution stack, plays a critical role in the enhanced process by automating previously labor-intensive pattern making steps. The tools allow for a completely digital workflow from concepts, to customer presentation and approval, to production-prep and manufacturing process optimization, and finally directly to fabrication, assembly and distribution.
Expanding the Power of 3D
3D CAD is widely accepted as a critical tool for product design and validation. Using 3D, parts are designed in context of one another, renderings are created for client presentations, and assembly constraints and interference checking can be done before any pieces are cut.
One key advantage of combining digital patterning with 3D CAD is the ability to integrate the design and production planning for both the hard components (frame, springs, etc..) and the soft goods portion of the product (i.e. fabric and foam).
This means that changes made in one area (ex. widening the seat) are reflected in all other components (i.e. updated pattern and material usage estimates).
Reducing the Steps = Faster Delivery and Less Cost
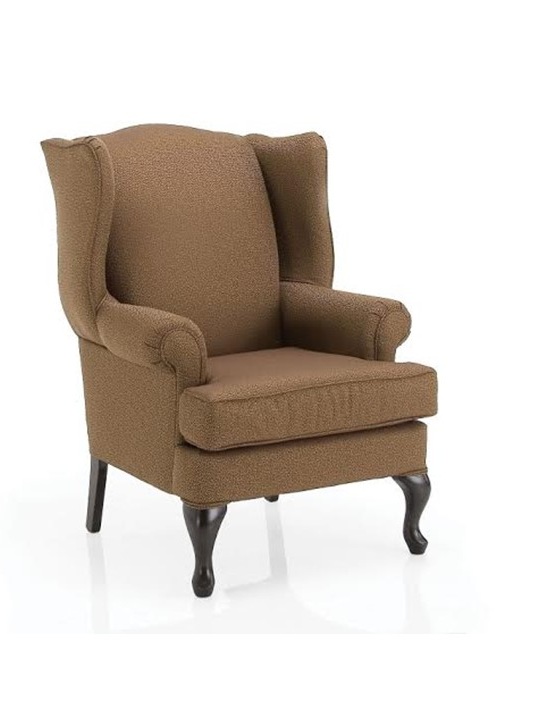
The biggest reason for the rising use of digital patterning is in the reduction of manual process steps. Designers can directly utilize 3D CAD data for patterning, eliminating the legacy “drape and tape” or pattern digitizing processes. Production teams receive 2D patterns and/or marker sets that are optimized and cutter-ready. Editing is nominal and can be done using the tools they already own. To illustrate this dramatic process improvement, we explored using 3D CAD, digital patterning and automating cutting in the creation of a piece of furniture - a wing back chair.

The 3D Model incorporates all parts of the design, from frame, to foam to fabric. The automated associations between the design components mean that changes in one piece are immediately reflected in the others.
Step 1. Creating Design Concepts
Product design processes start in a variety of ways. In our example, it starts with a pencil sketch which is then quickly converted to a full 3D model. Changes are made throughout the process and the design evolves as the process moves forward. For example, during the initial design review, the client requested widening of the seat cushion which drove an associated update to the seat back. This highlights one of the strengths of 3D CAD. Design changes and edits are fast and easy.
Step 2. Engineering the Solid Parts
Most 3D CAD products do an excellent job of helping designers when modeling of mechanical or machined part. In this example the frame and springs are modeled first. Then the cardboard section of the chair is designed and inserted in the final location and orientation in the model. As we mentioned, associations between the pieces is created automatically so that changes in one are reflected in the other.
Step 3. Engineering the Soft Parts (Foam and Fabric)
The section of the "wing" of the wing back chair is then modeled. This particular part has a wooden frame, a light cardboard or wood planar surface, foam which is modeled on top of the cardboard and then the fabric layer is created on top of the foam. All of this is captured in the single 3D CAD model. At the end of this step the modeling is complete and the team can move directly to the customer review and production preparation stages of the process.
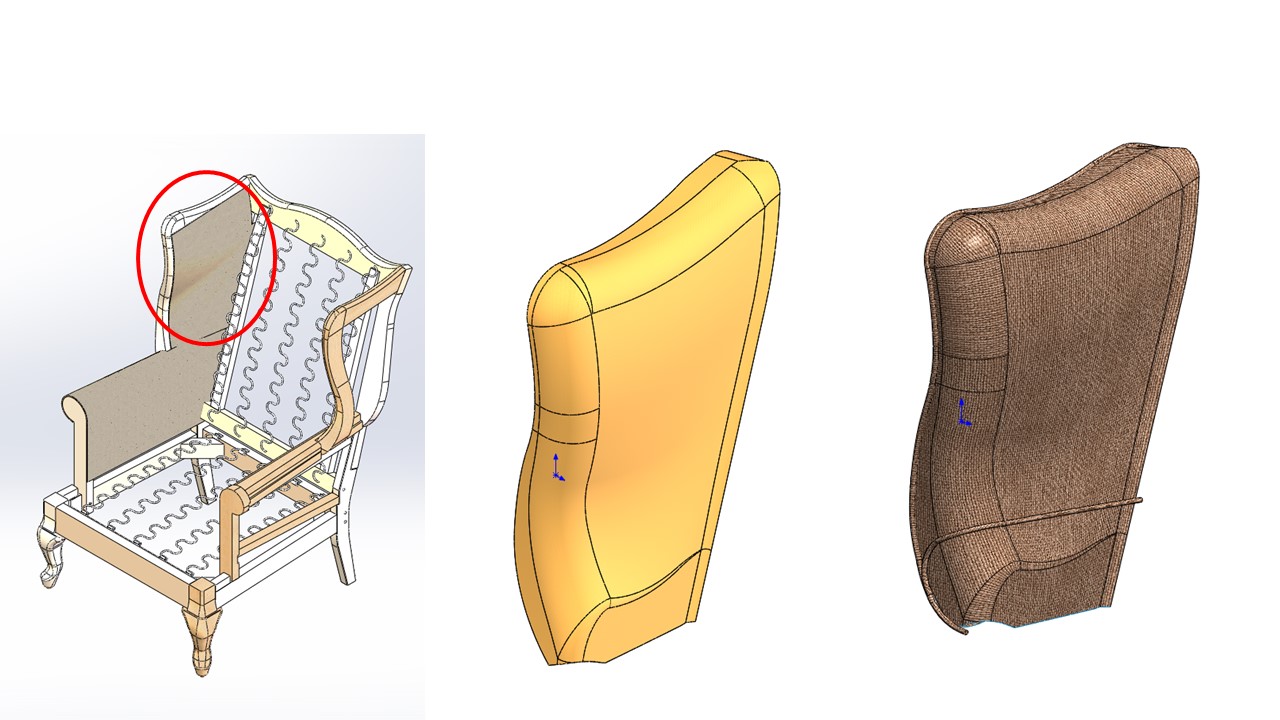
Creating the hard and soft components in a single model ensures the correct fit and function. In this example, the fabric (right) is a layer on top of the foam (middle) which is designed and placed in the proper location on top of the cardboard and the frame (left)

Renderings, again created from the same digital model used for production, provide an easy way to share and review the design with clients.
Step 4. Rendering
The final design is shown here in a rendered view. This can be used for design reviews, presentation to customers, or as website content. The rendering is a direct by-product of the 3D design process. In most cases, the designer can create the image themselves using features in the CAD tool. This is just another advantage of 3D. Digital design is not a nice to have. It is essential for a modern competitive business.
Step 5. Digital Patterning
In this final step in our process, the 3D digital designs are flattened into 2D pattern pieces in minutes. From there is a simple process to open the 2D patterns in AccuMark where pattern features, such as seam allowances, notches, piece tags, and hardware tags for buttons, zippers, etc. are added.

Traditionally, designers used manual, imprecise methods including “Draping and Taping” and rough pattern digitizing to go from the design to patterns. With Digital Patterning software like ExactFlat, its a simple process to convert the 3D design into 2D patterns in minutes.
A Linked Digital Workflow Saves Time
The addition of digital pattering represents a business-critical shift in process as manufacturers transition from mass production to mass customization best practices. Key benefits of this part of the solution include:
Fewer steps that are executed must faster with less change for error/rework
Linking the design of mechanical and soft components, simplifying the ability to explore innovative concepts and consumer changes
Direct integration with AccuMark and Gerber cutting tables which allow manufacturers to maximize the return on existing investments
All of this means, you can reliably increase your profit on every single part made. If your company is still using legacy manual processes for design, patterning and production-prep, then it is time to join your peers and go digital with 3D CAD, digital patterning and cutter automation capabilities.
To learn more about applying the advantages of digital processes to your business, click on the link below and set up a time to speak with one of our experts.


